
Installing a garburator in your kitchen can transform how you manage food waste, making daily cleanup faster, cleaner, and more efficient. For homeowners who enjoy practical upgrades, learning how to install a garburator is a valuable skill. While it may seem daunting at first, the process is straightforward when you understand the proper tools, steps, and safety precautions. This guide will walk you through everything, from selecting the right model to completing the installation and performing essential maintenance to ensure longevity and optimal performance. By the end, you’ll feel confident handling your garburator installation with ease.
What is a Garburator and Why You Need One
A garburator, also known as a garbage disposal, is a device fitted under a kitchen sink that grinds food waste into small particles, allowing them to be washed down the drain. The primary benefit is reducing food waste accumulation, keeping kitchens cleaner, and preventing unpleasant odors. Modern garburators are energy-efficient, operate quietly, and can handle various food scraps, including vegetable peels, fruit cores, and small bones. Installing one not only improves sanitation but also contributes to eco-friendly waste management. Understanding the device’s components, like the grinding chamber, motor, and splash guard, is key before starting installation.
Tools and Materials Needed for Installation
Before attempting to install a garburator, gather all necessary tools and materials. Essential tools include a screwdriver, adjustable wrench, pliers, plumber’s putty, bucket, and a hacksaw for any plumbing adjustments. You’ll also need a new garburator unit, a sink flange, mounting assembly, dishwasher connector (if applicable), and electrical wiring tools. Preparing these in advance ensures the process goes smoothly and avoids interruptions. Safety gear, such as gloves and goggles, is also recommended. Having a checklist will prevent common mistakes like forgetting to seal the sink flange or improperly connecting the unit to the plumbing and electrical system.
Preparing Your Sink for a Garburator
Proper preparation of your sink is crucial when learning how to install a garburator. Start by clearing out the cabinet space under the sink and turning off both water and electricity. Remove the existing drain assembly carefully, noting the placement of each part for reassembly. Inspect the sink’s drain hole to ensure it matches your garburator’s specifications. Apply a plumber’s putty around the sink flange to create a watertight seal. This step is essential to prevent leaks. Proper alignment of the flange and mounting assembly ensures the unit will sit securely under the sink, allowing smooth connection to the drain pipes and dishwasher hose if required.
Step-by-Step Installation Process
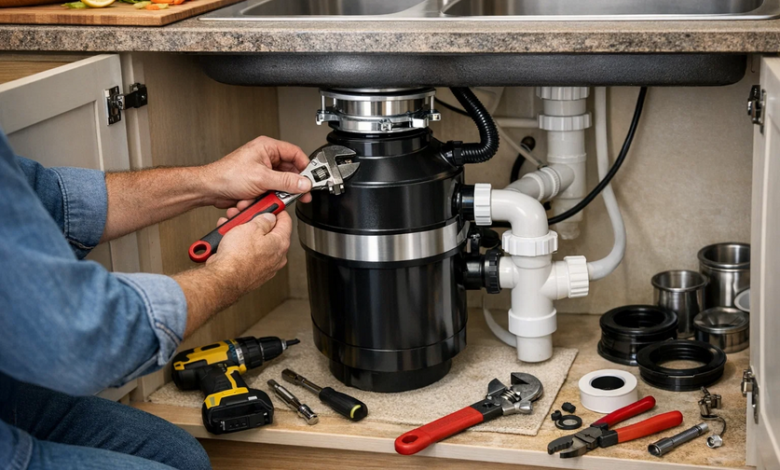
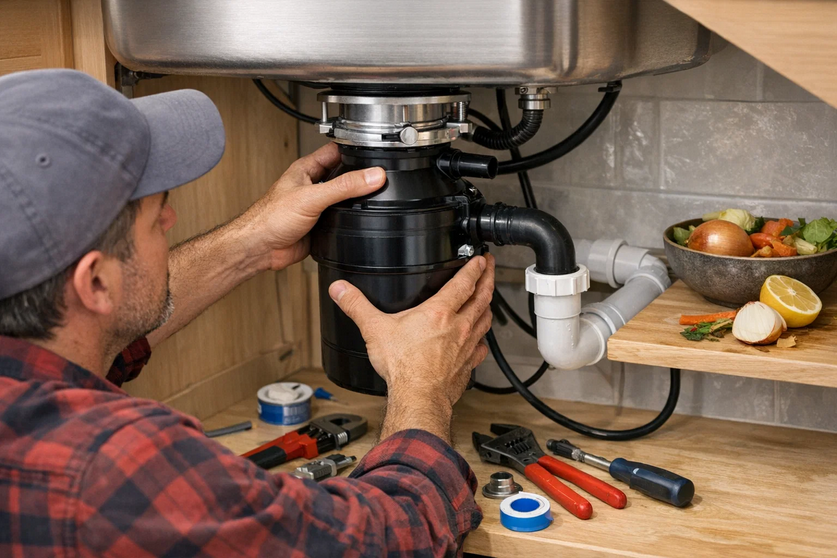
Installing a garburator involves several precise steps, each critical for optimal operation. Begin by attaching the sink flange with plumber’s putty to the drain opening. Then, assemble the mounting ring and secure it tightly under the sink using a mounting bracket. Next, lift the garburator into position and align it with the mounting assembly. Turn the unit clockwise until it locks into place. If your kitchen includes a dishwasher, connect the dishwasher hose to the disposal inlet, ensuring a tight seal. Finally, attach the discharge tube to the drain system. Test the alignment and make sure all connections are secure before moving on to the electrical setup.
Electrical Connection and Safety Tips
Connecting your garburator to power safely is a critical step in how to install a garburator. Most modern units require a grounded electrical outlet under the sink, but some older homes may need hardwiring. Always ensure the circuit is turned off at the breaker box before beginning. Strip the wires carefully and connect the disposal’s wires according to the manufacturer’s color codes: black to black (hot), white to white (neutral), and green to the ground screw. After connecting, secure all wires with wire nuts and ensure no bare wires are exposed. Testing the unit after installation confirms a safe and functional connection while minimizing the risk of electrical hazards.
Testing and Initial Use
Once the garburator is installed, it’s essential to test its functionality. Begin by running cold water into the sink, then turn on the disposal briefly to check for any leaks around the mounting assembly or drain connections. Feed small amounts of food waste gradually, avoiding fibrous or hard items like corn husks or large bones that could damage the unit. Listen for unusual noises, which may indicate loose parts or improper alignment. Consistent operation without vibration or leaking indicates a successful installation. Proper testing also ensures that the dishwasher connection works correctly, if applicable, and that the garbage disposal integrates smoothly with your kitchen plumbing.
Common Installation Mistakes to Avoid
Even experienced DIYers can make mistakes when installing a garburator. Common errors include using too much plumber’s putty, which can squeeze out and clog the drain, or failing to align the mounting ring correctly. Forgetting to connect the dishwasher hose or using the wrong electrical wiring can also cause problems. Another frequent mistake is testing the unit without running water first, which can damage the motor. Being aware of these potential issues allows you to avoid them, ensuring a safer and more efficient installation. Taking your time and following each step carefully reduces the likelihood of leaks, electrical hazards, or operational failures.
Maintenance Tips for Longevity
Maintaining your garburator after installation is key to prolonging its lifespan. Routine cleaning using a mixture of ice cubes and coarse salt can sharpen blades and remove debris. Avoid pouring grease, coffee grounds, or fibrous foods down the drain, as these can clog the system. Periodically check the mounting assembly and flange for leaks. Running the disposal regularly with cold water prevents rust and corrosion. If odors develop, grinding citrus peels or using baking soda and vinegar can freshen the unit naturally. Proper maintenance not only improves performance but also reduces repair costs and extends the life of your investment.
Troubleshooting Common Issues
Even a properly installed garburator can encounter minor problems. Common issues include leaks at the flange or drain connections, unusual noises, or a disposal that won’t start. Most problems are easy to resolve: tighten loose connections, remove jammed debris with tongs (never your hands), or reset the disposal using the reset button typically located on the bottom of the unit. Electrical problems may require checking circuit breakers or confirming wire connections. Understanding these troubleshooting methods helps homeowners maintain confidence in their DIY installation skills and ensures continuous, reliable operation of the garburator.
Benefits of Installing a Garburator
Investing in a garburator offers numerous practical and environmental benefits. It reduces the volume of food waste in trash bins, minimizes odor, and decreases trips to outdoor garbage bins. For eco-conscious homeowners, garburators support waste-water treatment processes and, in some municipalities, facilitate composting when used correctly. Convenience is another significant advantage: washing dishes and cleaning up after meals becomes faster and more hygienic. Modern models are designed for quiet, efficient operation, energy efficiency, and durability. Understanding these benefits can motivate homeowners to upgrade their kitchens and maintain their garburator properly for years to come.
Conclusion
Learning how to install a garburator empowers homeowners to improve kitchen hygiene, reduce food waste, and enjoy a more efficient cooking environment. By carefully preparing your tools, following step-by-step installation procedures, and taking proper safety precautions, the process becomes manageable even for first-time DIYers. Regular maintenance and awareness of common troubleshooting issues will ensure your unit operates effectively for years. Installing a garburator is not just a practical upgrade—it’s an investment in convenience, sustainability, and a cleaner home.
FAQs
1. How long does it take to install a garburator?
A typical installation takes about 1–2 hours for someone familiar with basic plumbing and electrical work. Beginners may need slightly more time.
2. Can I install a garburator without an electrician?
Yes, if your unit plugs into an existing grounded outlet. Hardwired installations require basic electrical knowledge and caution.
3. What foods should I avoid putting in a garburator?
Avoid fibrous foods (celery, corn husks), starchy items (potatoes), large bones, and grease, as these can clog or damage the unit.
4. How do I prevent odors from my garburator?
Run cold water during operation, grind citrus peels occasionally, and clean with ice and coarse salt regularly.
5. Can I connect my dishwasher to a garburator?
Yes, most units include a dishwasher inlet. Make sure the hose is securely attached to prevent leaks.
6. Is plumber’s putty necessary for installation?
Yes, plumber’s putty creates a watertight seal between the sink flange and the drain opening, preventing leaks.
7. How often should I maintain my garburator?
Basic maintenance every 1–2 months, with deeper cleaning and inspection every 6–12 months, will keep the unit in optimal condition.
Get more updates or Stories on Next Magazine